Tip: By default, there are four sample TIFF images in <Laserfiche Install Directory>\Laserfiche\Client 8. Use these to experiment with Universal Capture.
Selecting and configuring a scanning source is one step in the Preparing to Scan process for both Basic and Standard Mode. This topic covers the selection and configuration of the Universal Capture scan source.
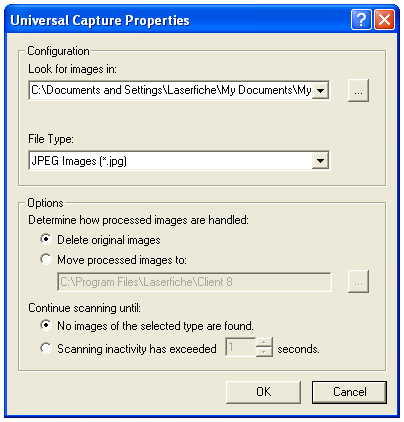
Universal Capture works as a virtual scanner by capturing images already stored on your computer or network drive. This enables you to:
Universal Capture can scan TIFF, bitmap, and JPEG images.
Selecting and configuring this scan source
Tip: By default, there are four sample TIFF images in <Laserfiche Install Directory>\Laserfiche\Client 8. Use these to experiment with Universal Capture.